After installing and activating Itinerak, you can display the travel planner anywhere on your WordPress site using a simple shortcode.
You can add the Itinerak Planner to a dedicated page, an existing page, inside a blog post, a sidebar or widget area, or any other location that supports WordPress shortcodes.
This guide will show you how to add the Itinerak Planner to the most common areas of a WordPress website and choose the placement that works best for your site.
Choose the Right Itinerak Shortcode
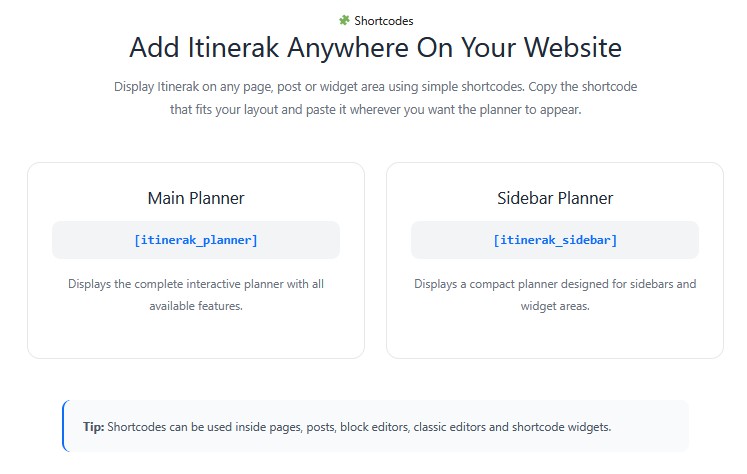
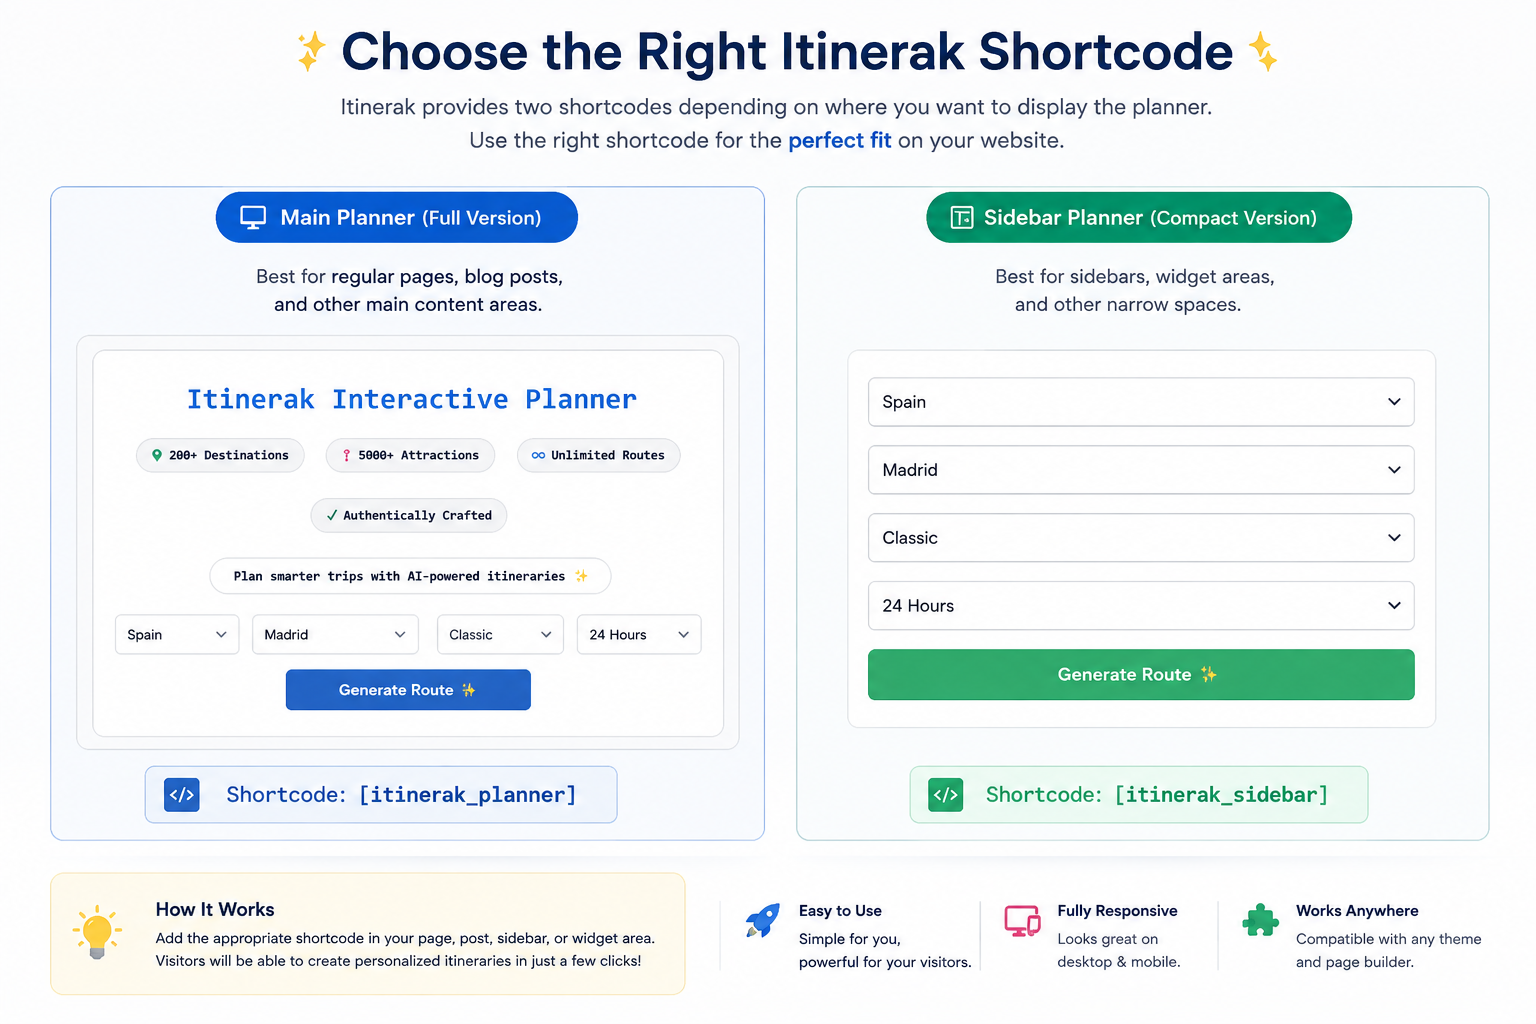
Itinerak provides two shortcodes depending on where you want to display the planner. You can find both shortcodes in the Shortcodes section of the official Itinerak Documentation page.
For regular pages, blog posts, and other main content areas, use the Main Planner shortcode:
[itinerak_planner]
For sidebars, widget areas, and other narrow spaces, use the compact Sidebar Planner shortcode:
[itinerak_sidebar]
Choose Where to Display the Itinerak Planner
Before adding the shortcode, decide where the planner should appear on your WordPress site. Itinerak can be placed in different areas depending on how you want visitors to access the trip planner.
Add Itinerak to a Dedicated WordPress Page
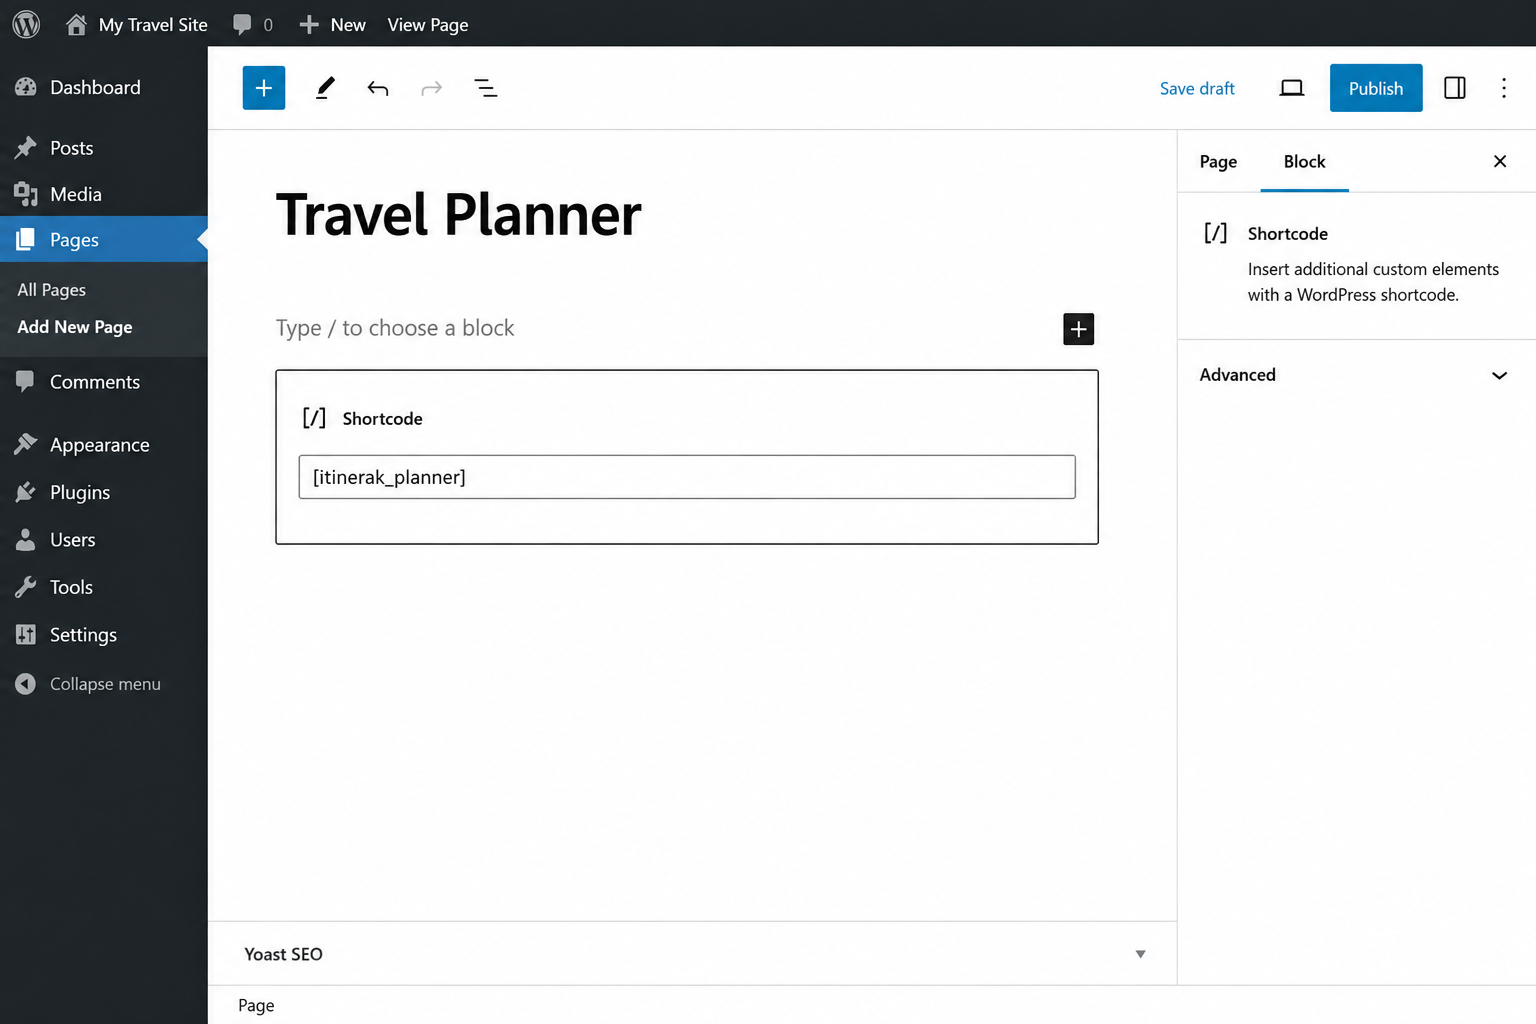
A dedicated page is a great choice if you want the Itinerak Planner to have its own space on your website. You can create a page such as Travel Planner, Plan Your Trip, or any title that fits your website.
From your WordPress dashboard, go to Pages → Add New. Give your new page a title, then click the + button in the editor and add a Shortcode block.
Paste the Main Planner shortcode into the Shortcode block:
[itinerak_planner]
Click Publish when the page is ready. You can then view the page on your website to confirm that the full Itinerak Planner is displayed correctly.
Add Itinerak to an Existing WordPress Page
You do not need to create a dedicated page for Itinerak. The planner can also be added to an existing WordPress page, making it easy to integrate trip planning into content that is already part of your website.
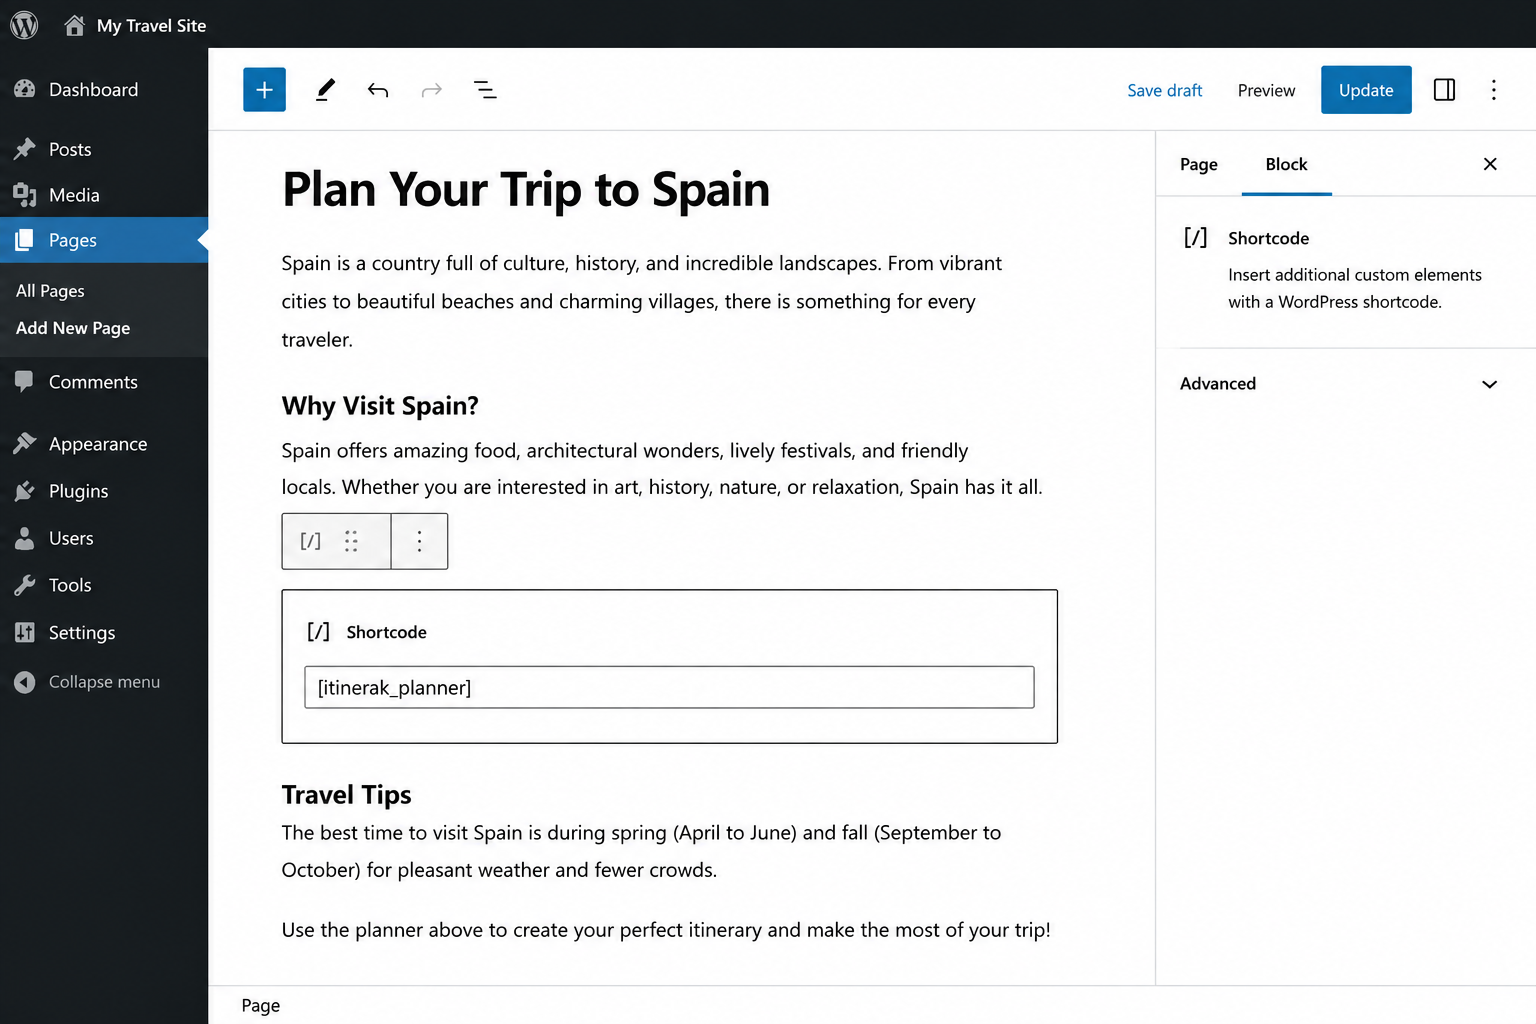
From your WordPress dashboard, go to Pages → All Pages and edit the page where you want the planner to appear. Choose the position in your content, click the + button, and add a Shortcode block.
Paste the Main Planner shortcode into the block:
[itinerak_planner]
You can place the planner between sections of your content or wherever it fits naturally on the page. When you are finished, click Update to save your changes.
Add Itinerak Inside a WordPress Blog Post
You can also place the Itinerak Planner directly inside a blog post. This is especially useful for travel guides, destination articles, and other content where readers may want to turn what they are reading into a personalized itinerary.
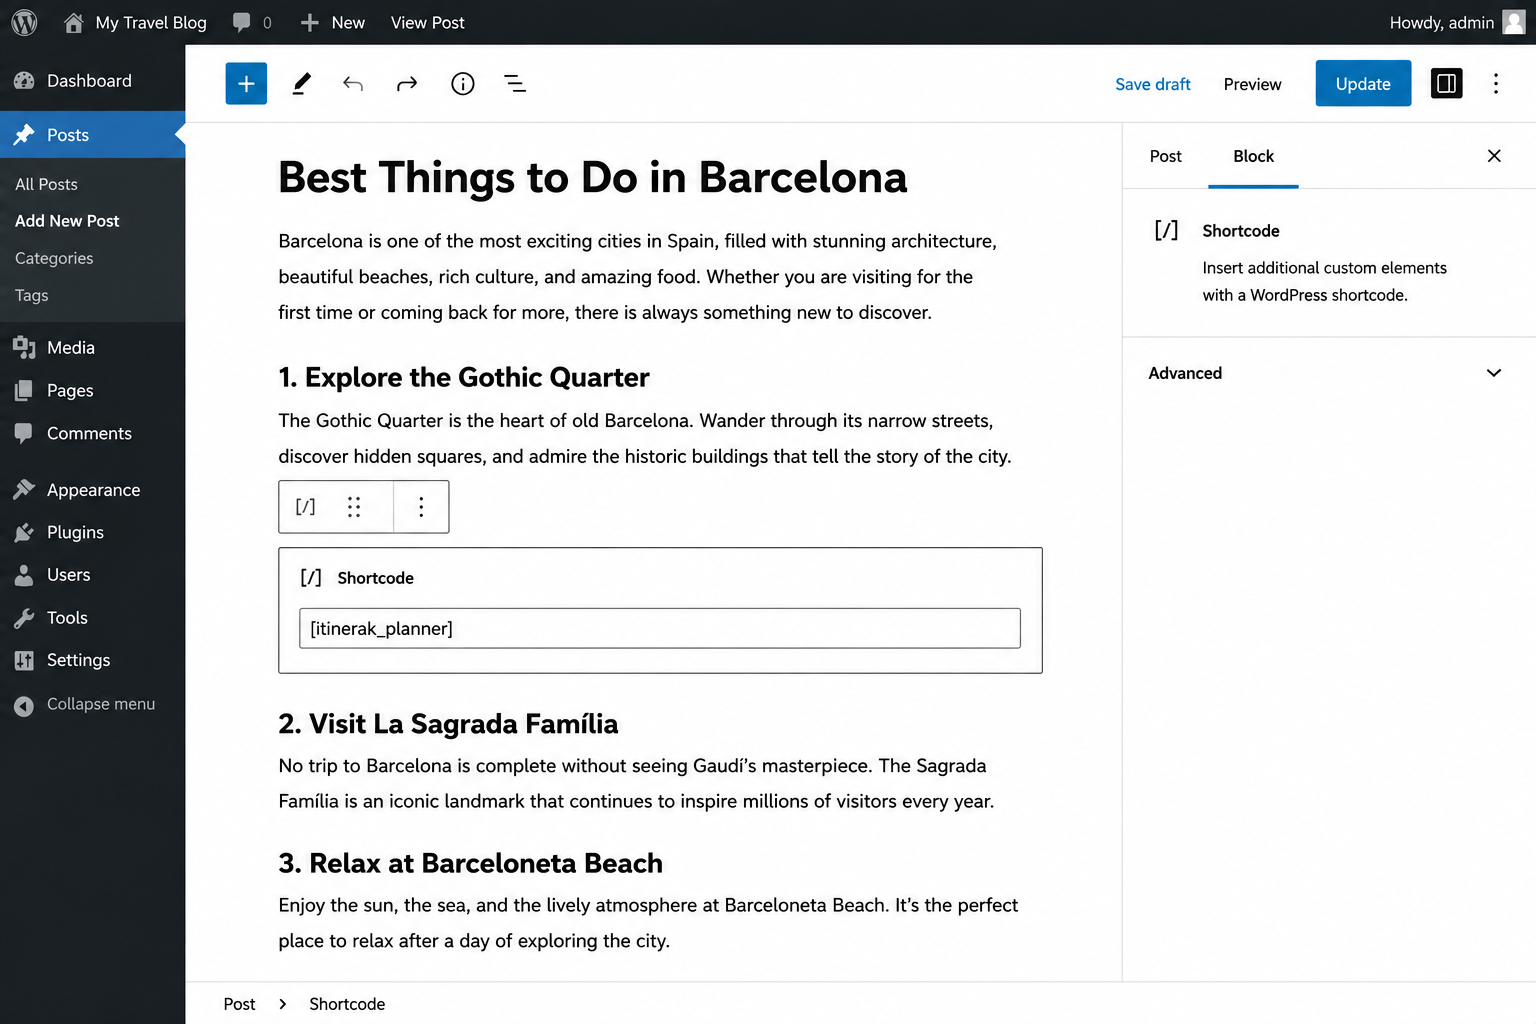
From your WordPress dashboard, go to Posts → All Posts and open the article you want to edit. Choose where you want the planner to appear, click the + button, and add a Shortcode block.
Add the Main Planner shortcode:
[itinerak_planner]
Position the planner where it naturally supports the article, then click Update to save your changes. The full Itinerak Planner will appear at that position when visitors read the post.
Add Itinerak to a Sidebar or Widget Area
For narrower areas of your website, Itinerak includes a compact version of the planner designed specifically for sidebars and widget areas.
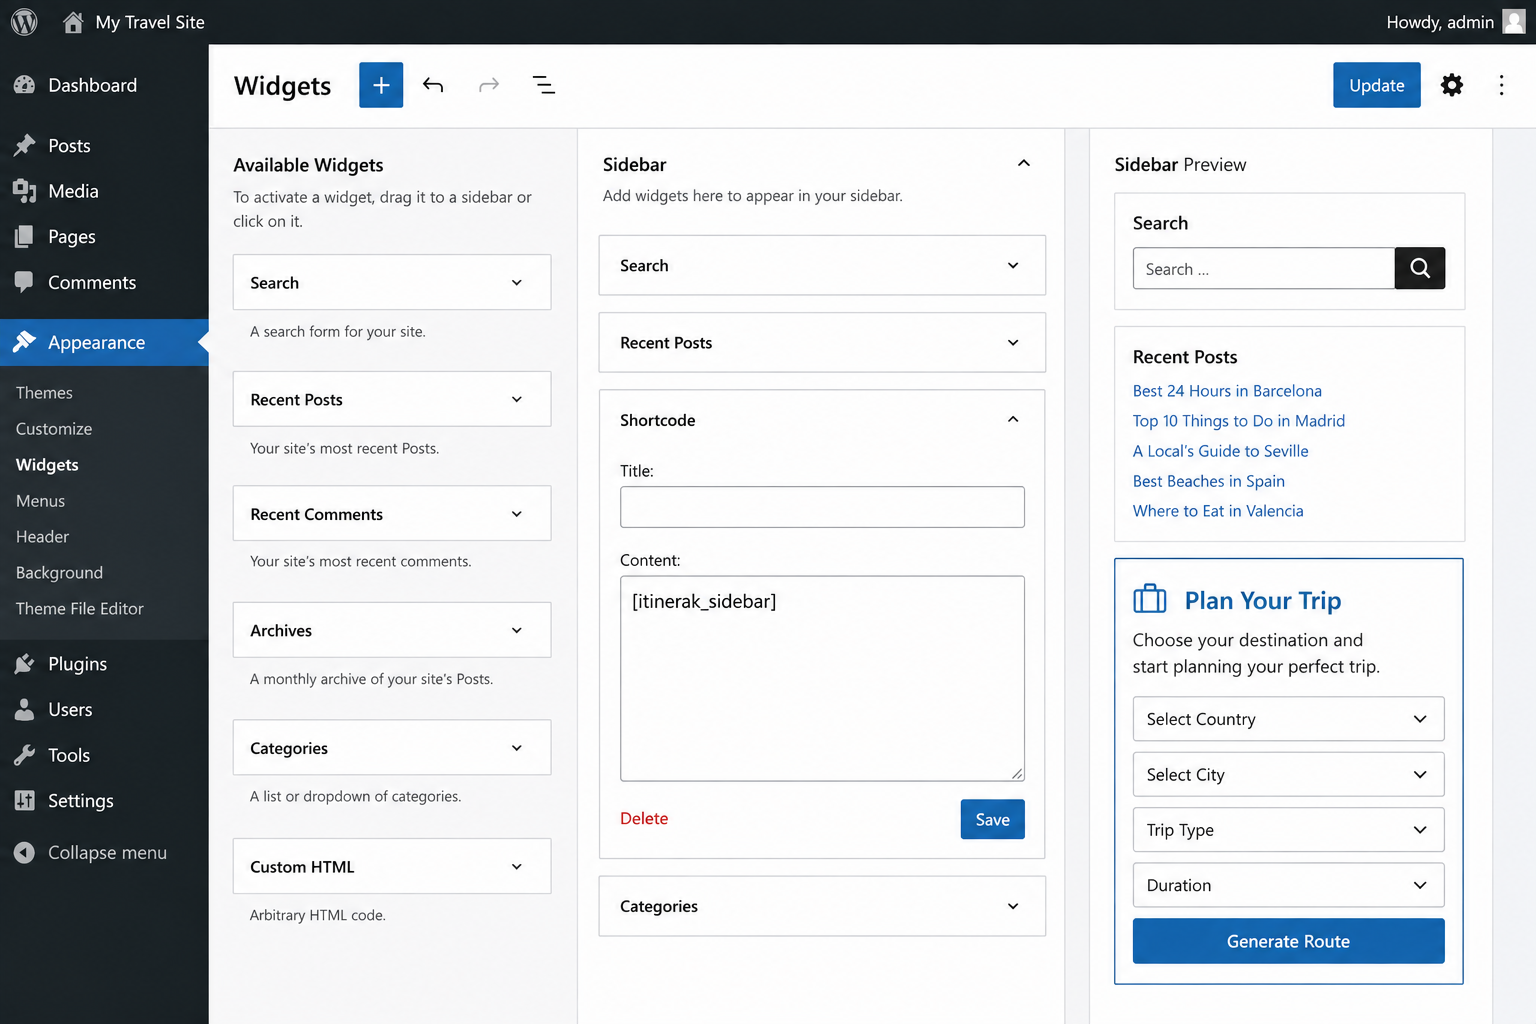
Open the widget settings available with your WordPress theme and choose the sidebar, footer, or other widget area where you want Itinerak to appear. Add a block or widget that supports shortcodes and use:
[itinerak_sidebar]
The Sidebar Planner uses a more compact layout than the Main Planner, allowing it to fit naturally into smaller spaces without requiring a full-width content area.
Use Itinerak with a WordPress Page Builder
Itinerak is not limited to the default WordPress block editor. If your website uses a page builder, you can display the planner using any element or widget that supports WordPress shortcodes.
In your page builder, add its Shortcode element or equivalent widget to the location where you want the planner to appear. For a standard content area, use:
[itinerak_planner]
If you are building a narrow sidebar or similar compact area, use the Sidebar Planner instead:
[itinerak_sidebar]
Once the shortcode is added, the page builder handles the surrounding layout while Itinerak displays the appropriate planner inside that area.
Preview and Test the Itinerak Planner
After adding Itinerak to your preferred location, open the page on the front end of your website and make sure the planner is displayed correctly.
Test the planner by selecting a country, city, trip type, and duration, then click Generate Route. Make sure the planner loads correctly and generates a route as expected. If you added the Sidebar Planner, test it in the same way and confirm that it displays properly within the available sidebar or widget space.
Your Itinerak Planner Is Ready
You can now display Itinerak wherever it works best for your website — on a dedicated page, inside existing content or blog posts, in a sidebar or widget area, or through a compatible page builder.
Once the shortcode is in place, Itinerak is ready for your visitors to start planning their trips.