Generating your itinerary is only the beginning. Once your Itinerak route is ready, you can use a collection of built-in tools to explore places, save your route, share it, export it, and continue discovering more travel experiences.
In this guide, you will learn how to use the features available inside your generated itinerary and get more from every Itinerak route.
Open Your Route in Google Maps
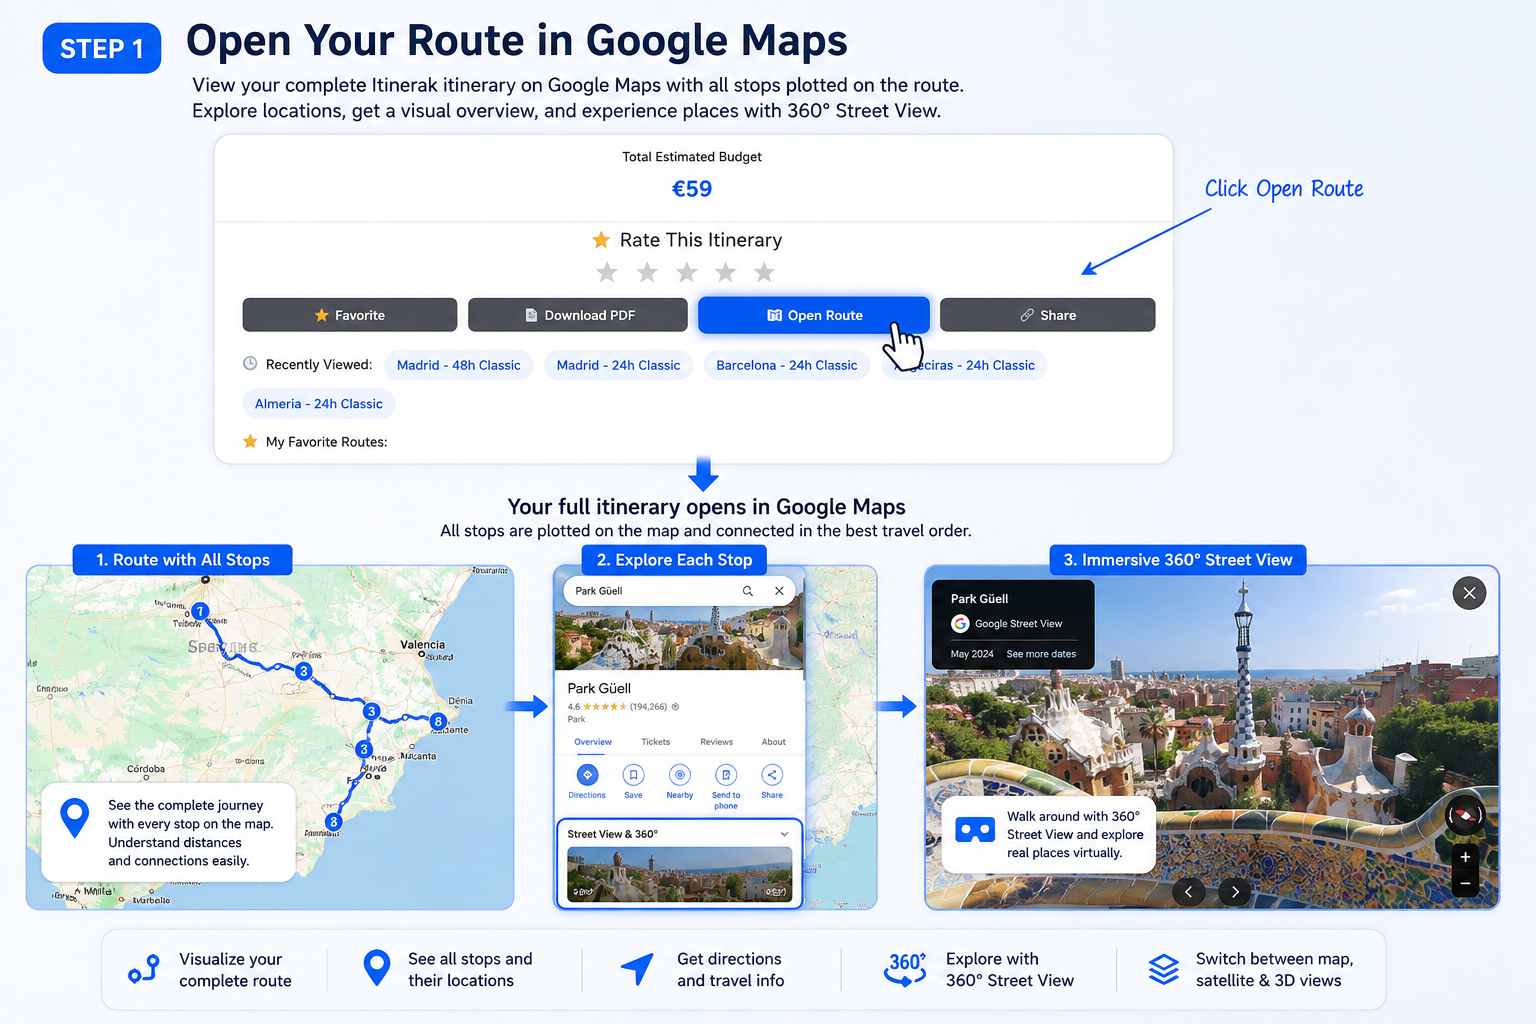
Once your itinerary is ready, you can open the complete route in Google Maps. Click Open Route in the itinerary tools to view your travel route directly on the map.
Itinerak sends the route to Google Maps with the itinerary stops plotted along the journey, giving you a visual overview of how the different places in your trip connect.
You can then use the available Google Maps features to explore the route in more detail. Where supported, this includes immersive 360° Street View imagery, allowing you to virtually explore streets and locations along your itinerary before or during your trip.
Save a Route to Your Favorites
Found an itinerary you want to keep? Click the Favorite button in the route tools to save the itinerary for quick access later.
Saved itineraries appear under My Favorite Routes, allowing you to return to routes you liked without having to search for the destination and generate the same itinerary again.

Download Your Itinerary as a PDF
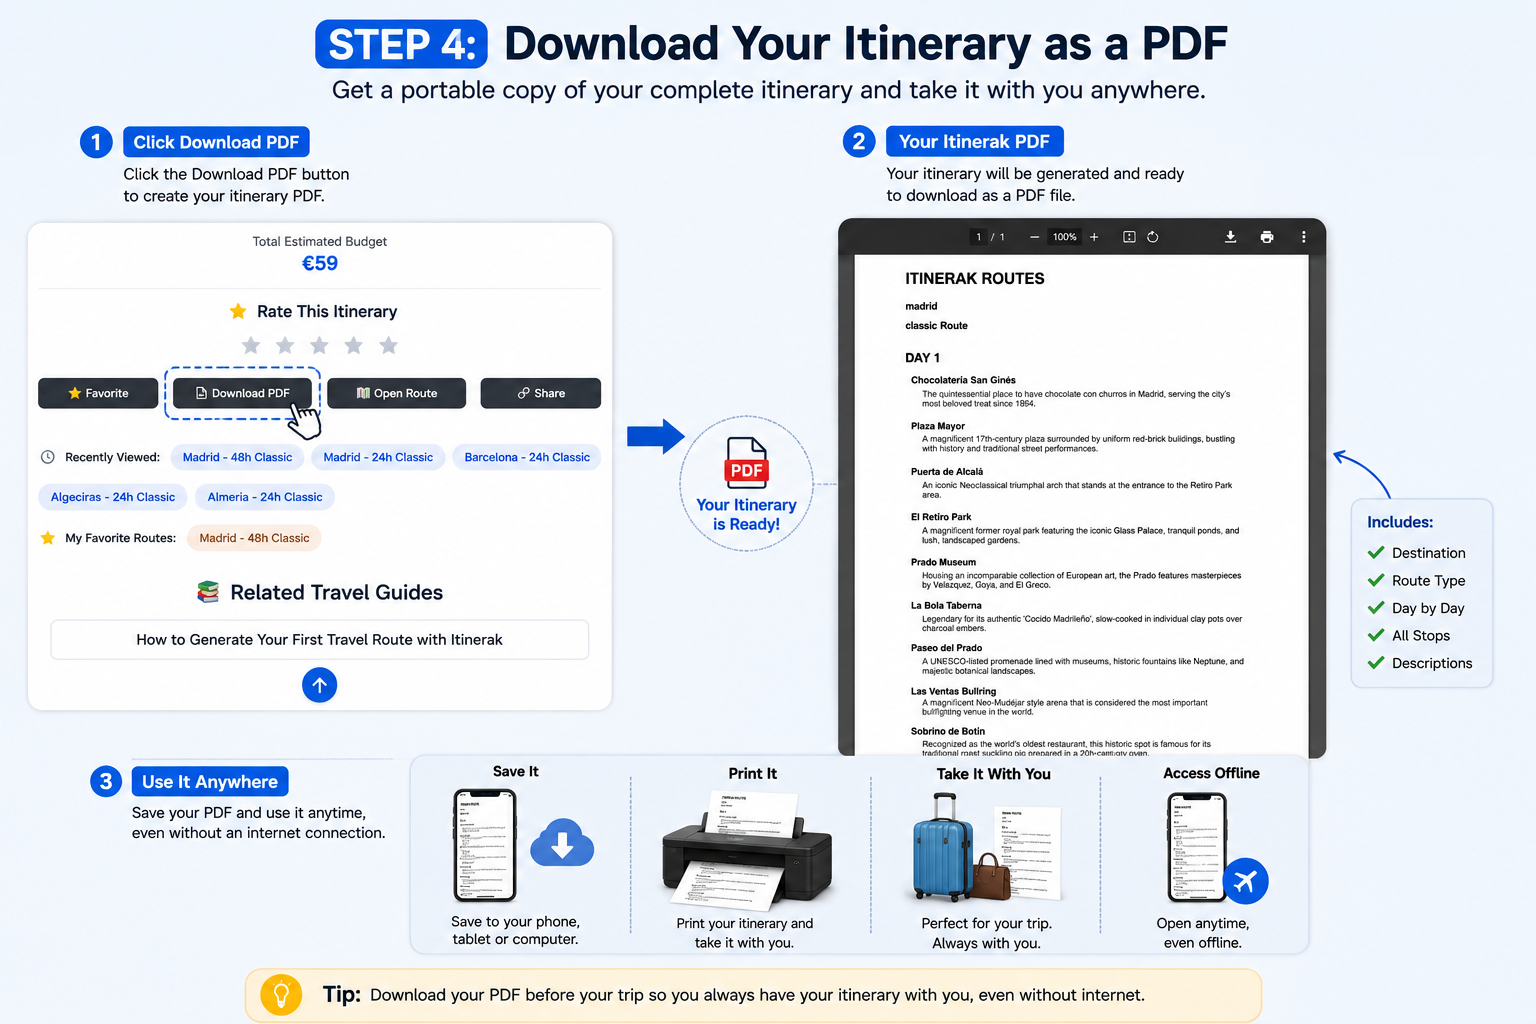
Want to keep a copy of your itinerary outside the website? Click Download PDF in the route tools to create a downloadable version of your Itinerak travel route.
The PDF gives you a convenient version of the itinerary that you can keep on your device for your trip or print when you prefer having a physical copy with you.
Share Your Travel Route
Planning a trip with friends, family, or travel companions? Click the Share button in the itinerary tools to quickly send your generated Itinerak route to others.
Itinerak gives you several ways to share your itinerary. You can send the route directly through WhatsApp, Telegram, Facebook, or X, or select Copy Link to copy the route URL and share it anywhere you prefer.

Return to Recently Viewed Routes
Itinerak automatically keeps your recently viewed itineraries within easy reach, so you can return to routes you explored earlier without starting the planning process again.
Below the itinerary tools, the Recently Viewed section displays your recent routes with useful details such as the destination, duration, and route type.
Every route name in this section is clickable. Simply click the itinerary you want to revisit and Itinerak will open that route again directly — there is no need to re-enter the country, city, trip type, or duration.

Continue Exploring Your Destination
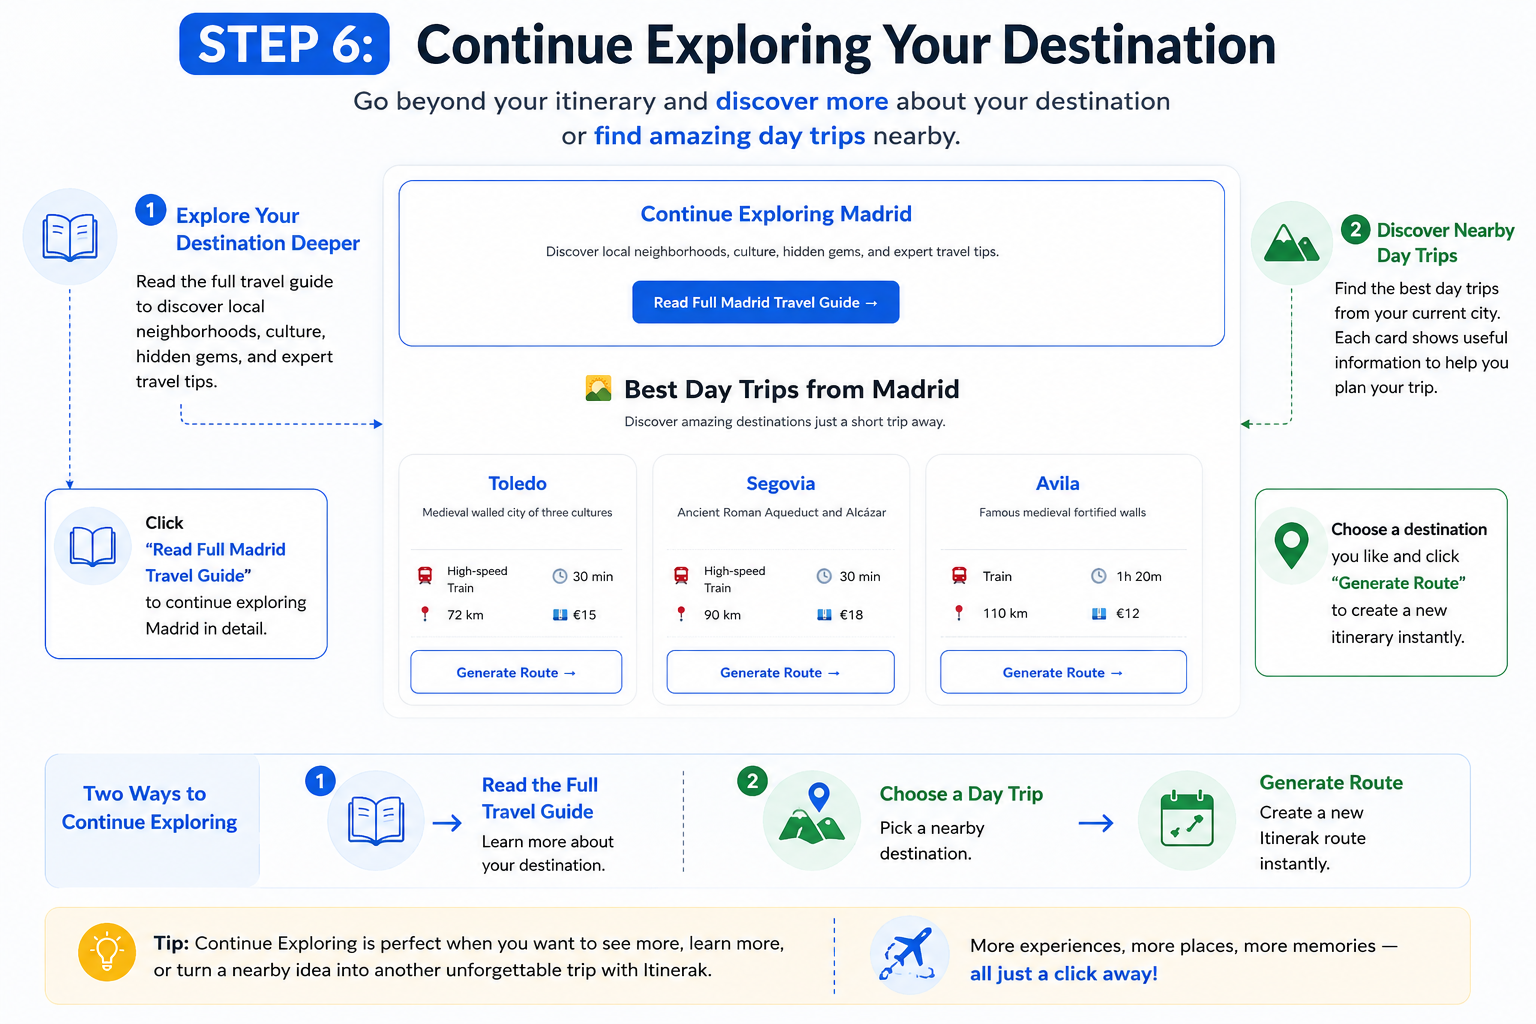
Your Itinerak journey does not have to end when the itinerary is complete. The Continue Exploring section helps you discover more about your current destination and find nearby places worth adding to your trip.
Start with the destination travel guide to explore local neighborhoods, culture, hidden gems, and additional travel information. Simply click Read Full Travel Guide to continue learning about the city you are visiting.
Below the guide, Best Day Trips introduces nearby destinations that can be reached from your current city. Each destination card provides useful planning information such as travel time, distance, transportation, and estimated cost.
Found a destination you want to visit? Click Generate Route on its card to start planning a new itinerary for that destination.
Discover Related Travel Guides
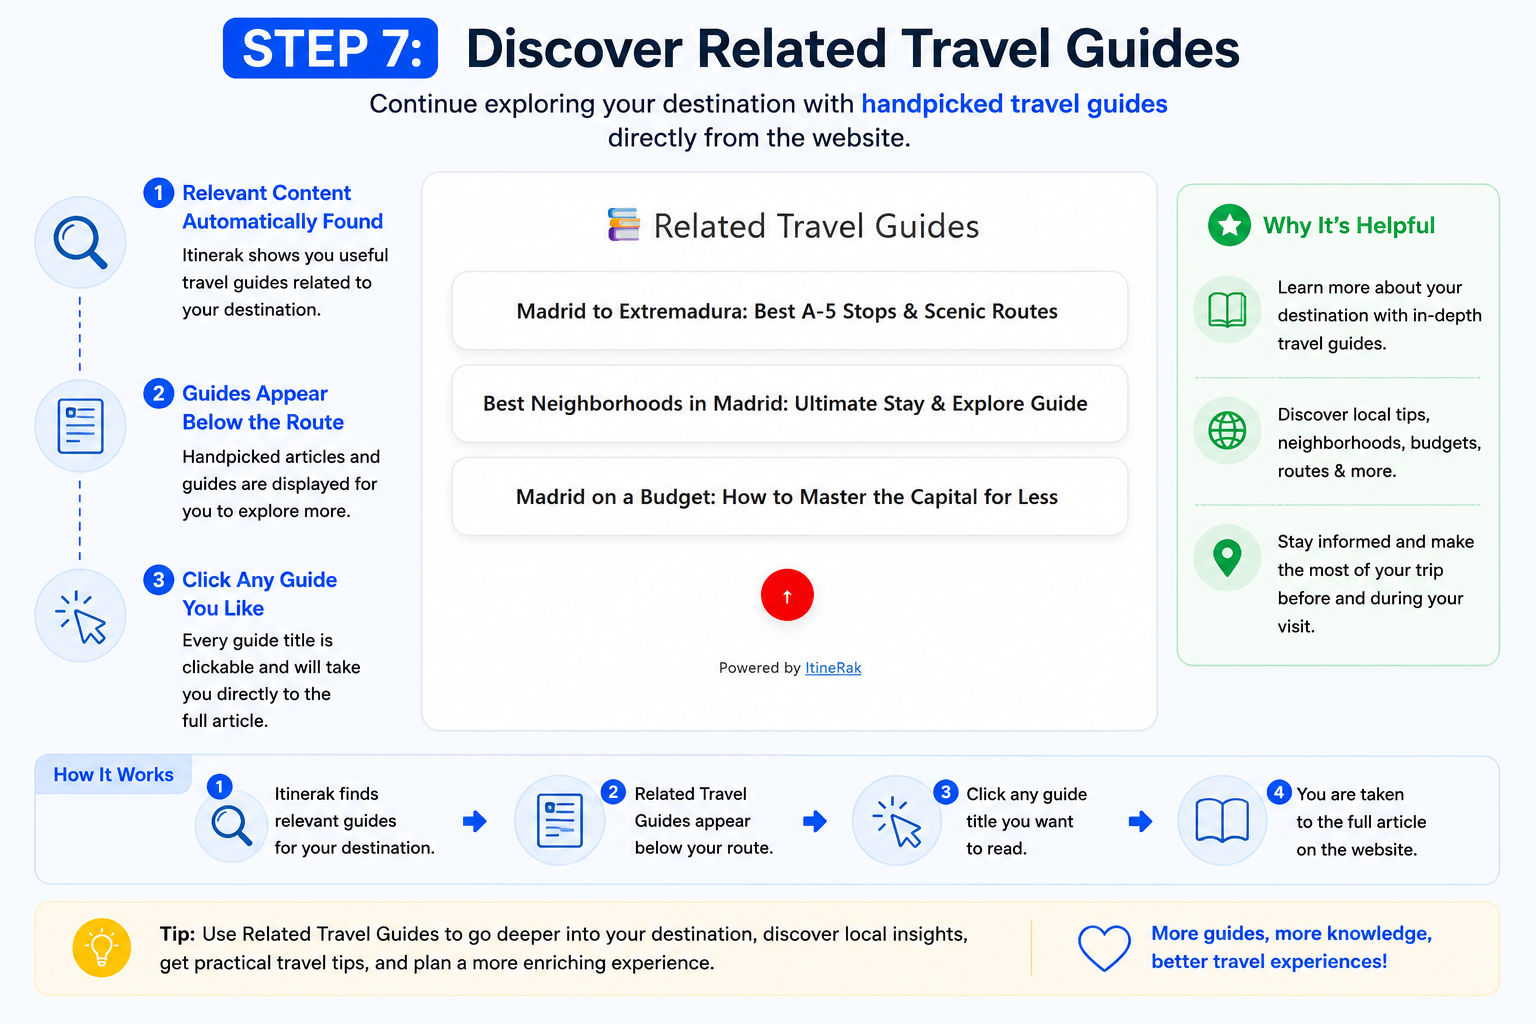
Your itinerary can also connect you with useful travel content related to the destination you are exploring. Look for the Related Travel Guides section available with your route.
These guides give you an easy way to continue learning about the destination beyond the itinerary itself, with additional travel information and relevant content available directly from the website.
Each guide title is clickable. Select a guide that interests you and Itinerak will take you directly to the article, allowing you to continue exploring without having to search for related content manually.
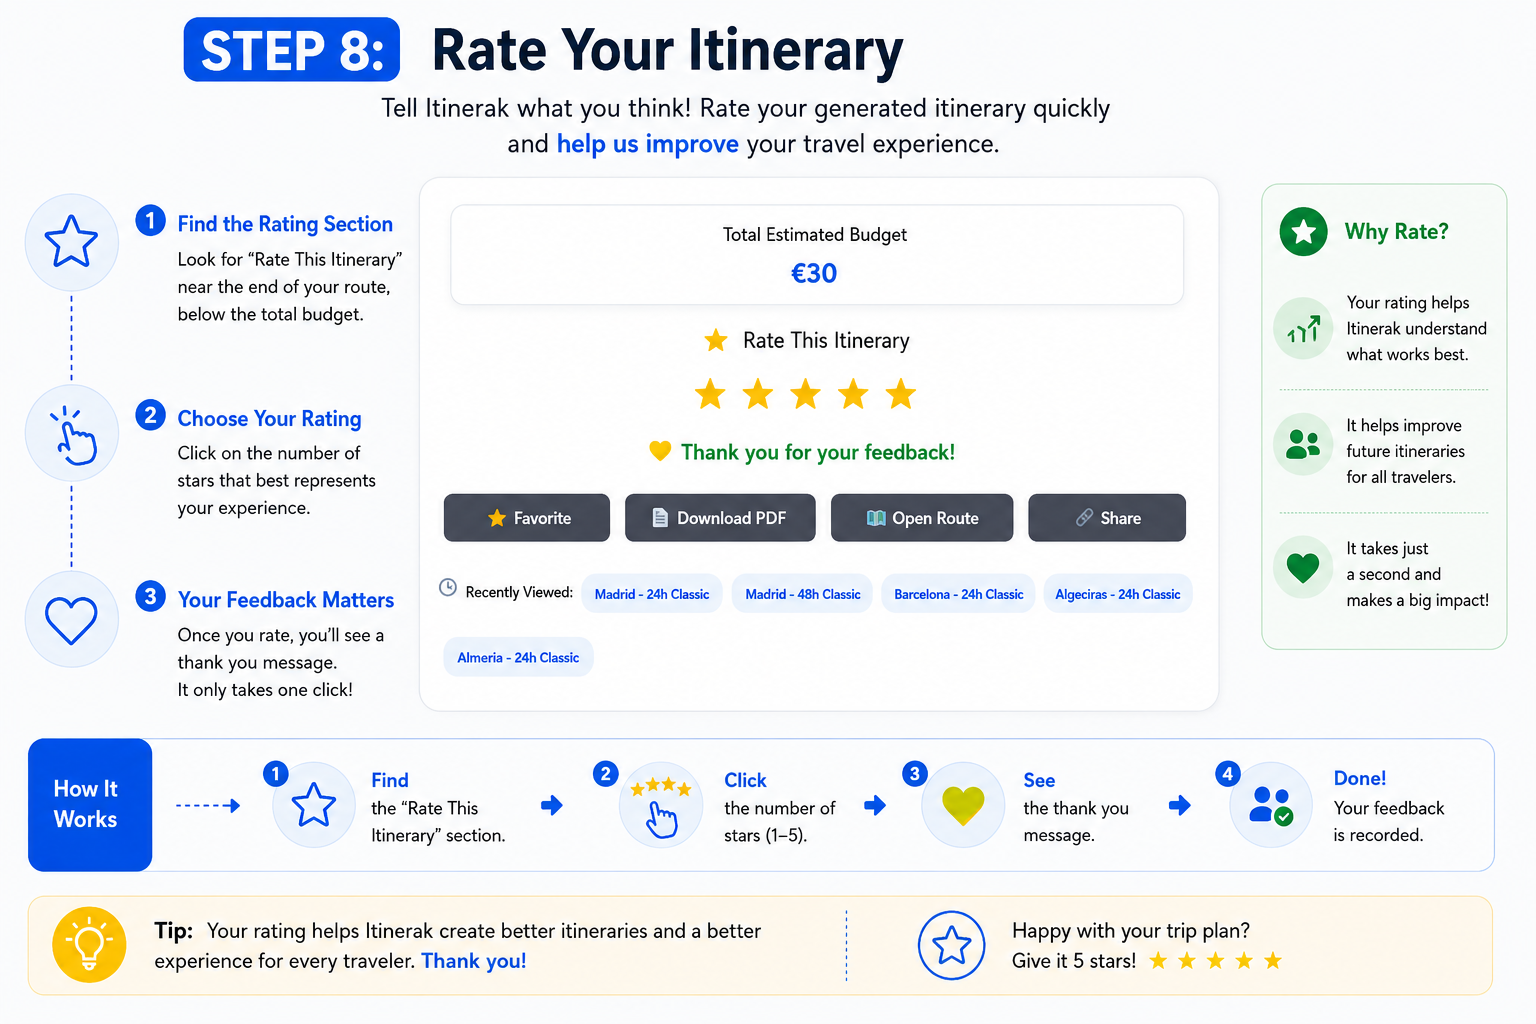
Rate Your Itinerary
After exploring your generated route, you can quickly tell Itinerak what you think about the itinerary using the built-in route rating feature.
Look for Rate This Itinerary near the end of the route. You will see five stars representing the available rating. Simply click the number of stars that best reflects your experience with the itinerary.
You can choose a rating from 1 to 5 stars, making it easy to provide feedback without leaving the route or completing a separate form.
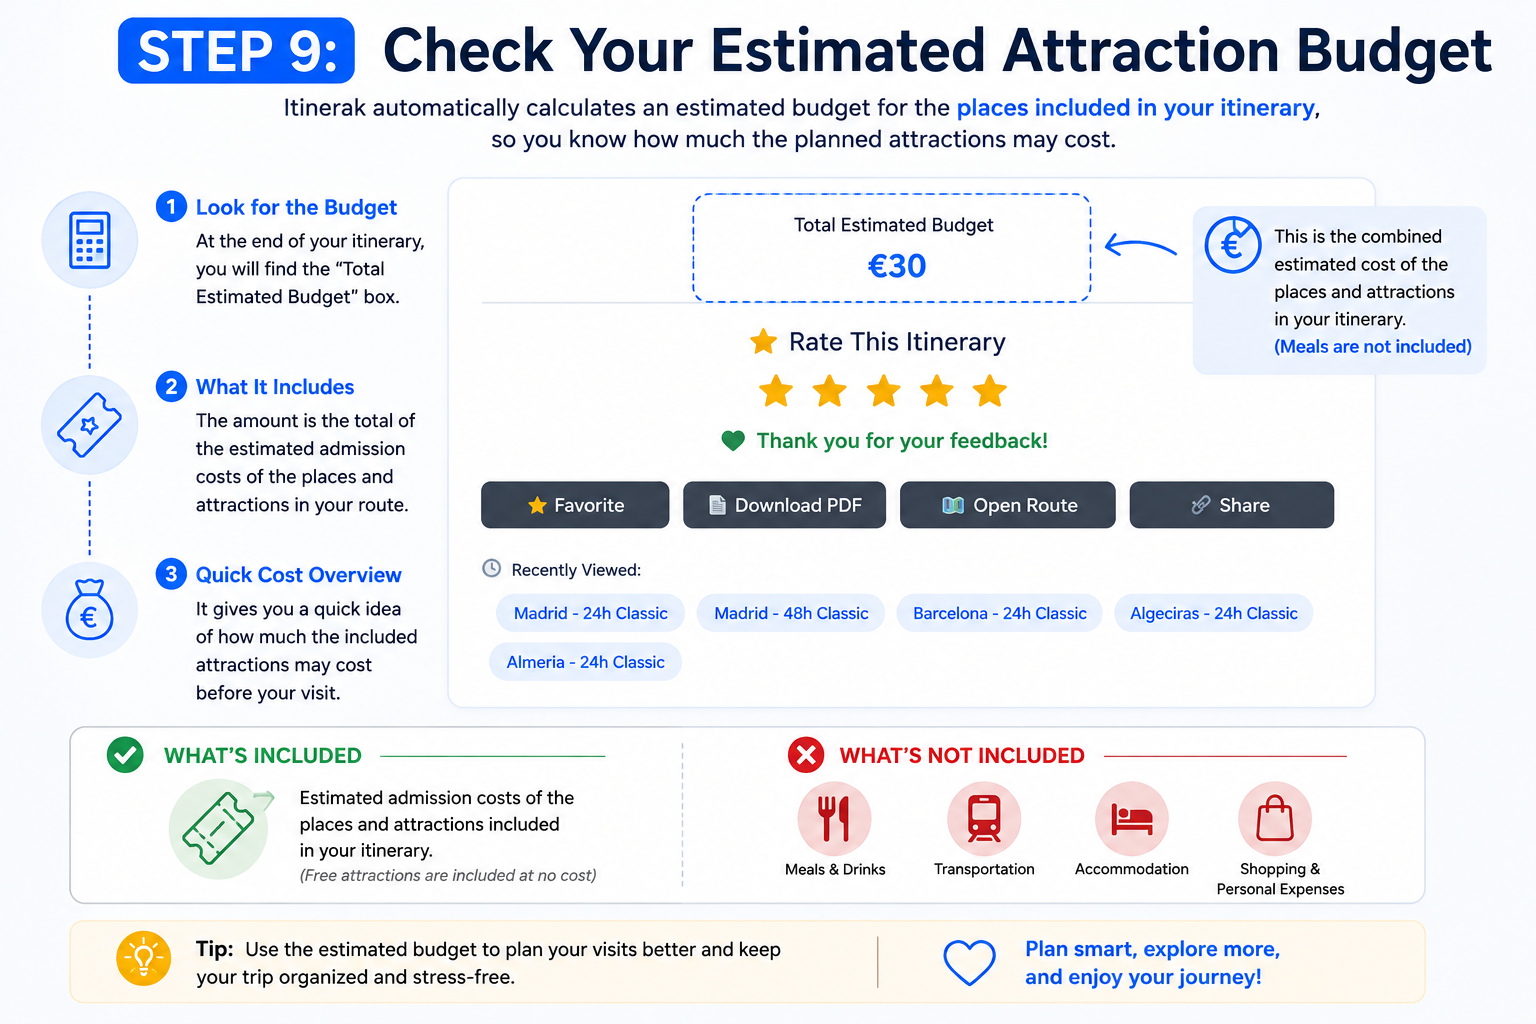
Check Your Estimated Attraction Budget
Itinerak automatically calculates an estimated budget for the places included in your generated itinerary, giving you a quick idea of how much the planned attractions may cost.
At the end of the route, look for Total Estimated Budget. This amount combines the estimated admission costs of the places and attractions included in your itinerary.
Free attractions are naturally included at no additional cost, while places with an estimated admission fee contribute to the total shown in the budget summary.
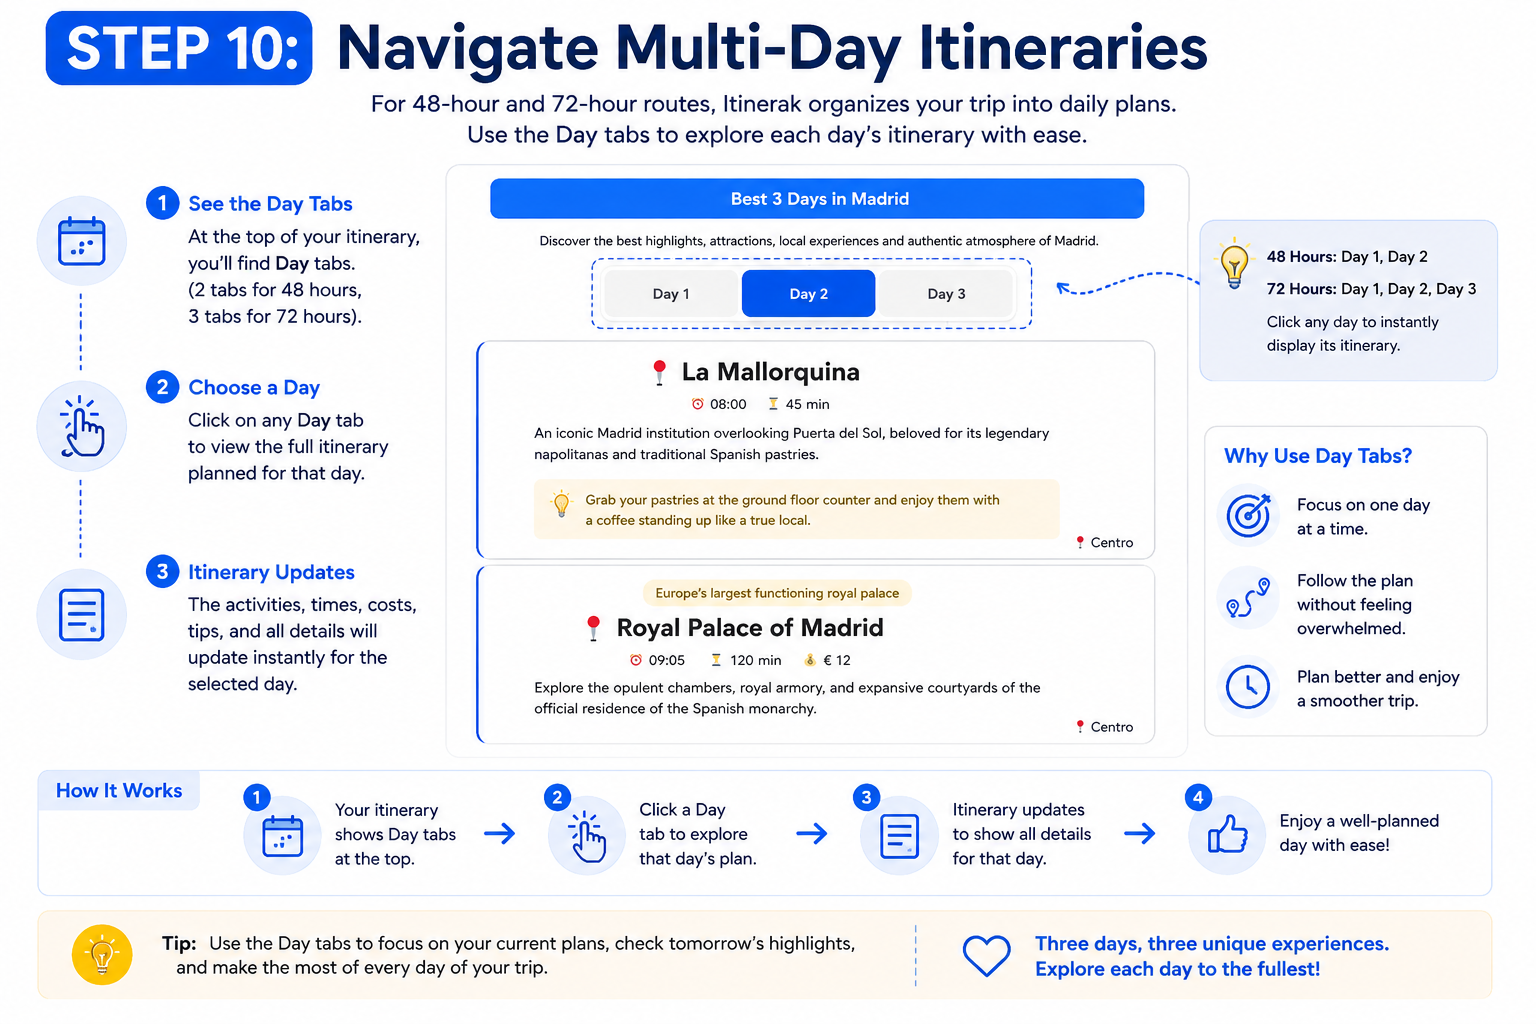
Navigate Multi-Day Itineraries
Planning more than one day? Itinerak organizes longer itineraries into separate daily plans, making 48-hour and 72-hour routes easier to explore and follow.
At the top of a multi-day itinerary, you will find dedicated Day tabs. A 48-hour route is divided into Day 1 and Day 2, while a 72-hour route includes Day 1, Day 2, and Day 3.
Click any day to instantly display its itinerary. The route cards below will update to show the places, timing, visit duration, estimated costs, local tips, and other details planned specifically for that day.
Make the Most of Every Itinerak Route
Your Itinerak itinerary is more than a list of places to visit. Once your route is generated, you can explore it on the map, save it to your favorites, download it as a PDF, share it with others, revisit previous routes, discover related travel content, check estimated attraction costs, rate your itinerary, and easily navigate multi-day plans.
But there is even more information inside the itinerary itself. Every route card includes useful symbols and details designed to help you understand when to visit, how long to stay, what to expect, and how each stop fits into your day.